ラベル chapter3 の投稿を表示しています。 すべての投稿を表示

2008年6月14日土曜日

fwinkの設定

fwinkから画像がsfcサーバにアップできないという問題ですが解決しました。


fwinkの設定で、ftp serverは普通にccz00.sfc.keio.ac.jpとかでいいっぽい
次に画像を保存する先のフォルダ指定がだめでした

アカウントの直下のcatcamフォルダに保存したいので

~/public_html/catcam

とします。

本に書いてある/public_html/catcamだと
public_htmlがrootの直下にあるという意味になります。
実際sfcサーバはもうちょっとファイルの階層がありますので
指定した先がないよ~~ってなっちゃうのです。

ちなみにshokai様が教えてくれたトンネリングは実践したのですが
接続はできませんでした。なんでじゃー。
よくわかりませんが、通路をわざわざつくらなくても
FTPアクセスできるようになったんですかね??

cat is on the mat!

utano

tmgちゃんお疲れ☆
p.110の途中までしかやっていませんが
私はネコちゃんがマットにのってるよメールがきましたー!!!

p.109のコードのvoid setup()なのですが

void setup(){
//open a connection to the host:
client = new Client(this, "web.sfc.keio.ac.jp", 80);

//send the HTTP GET request
client.write("GET /~t05541ss/catcam/cat-script.php?sensorValue=321 HTTP/1.0\r\n");
client.write("HOST: web.sfc.keio.ac.jp\r\n\r\n");
//note that you've got a request in progress
requestInProgress = true;
}

上記のようにかくと動きました!
tmgさまのアカウントでそこ書き直してみたらいけるかなぁ??

TMGlogue

とまごー奮闘記!
Putting It All Togetherにて詰まりました

道程:
arduinoでプロセッシングの値を読む○

processingでセンサの値のグラフを表示する○

いやいやphpに入る 「トムは14歳です」○

CNSにてp107を確認○
--------------------------
んじゃぁprocessingとphp連携してみましょうかね!

まづp108のphp(自分仕様なのでコピペの際は変更してください)
       (書き込めなかったのでひらがなは適宜直してください)

$threshold = 320;
echo"<えいちtml><へead><ぼody>\n";
foreach($_REQUEST as $key => $value)
{
if ($key =="sensorValue"){
$sensorValue = $value;
}
}
if ($sensorValue > $threshold){
$messageString = "The cat is on the mat at http://web.sfc.keio.ac.jp/~s06643yt/catcam.";
echo $messageString;
send_mail(ゆかちっく[at]gmail.com,"the cat",$messageString);
}else{
echo "

the cat is not on the mat.

\n";
}
echo"\n";
end;
function send_mail($to,$subject,$message){
$from = "ゆかちっく[at]gmail.com";
mail($to, $subject,$message,"From: $from");
}
?>

つまり320以上の値を送ったらgmailにメールを送れってことですね!

そしてprocessing
import processing.net.*;
Client client;
boolean requestInProgress;
String responseString = "";
void setup()
{
client = new Client(this, "http://web.sfc.keio.ac.jp/~s06643yt",80);
client.write("GET /catcam/cat-script.php?sensorValue=321 HTTP/1.0\r\n");
client.write("HOST: http://web.sfc.keio.ac.jp/~s06643yt\r\n\r\n");
requestInProgress = true;
}
void draw()
{
if(client.available() > 0){
responseString +=char(client.read());
print("");
} else{ if(responseString.length() > 0){
if(requestInProgress == true){
println(responseString);
requestInProgress = false;
responseString = "";
}
}
}
}

つまり321という値をさっきのPHPに送れってことですね!
さあさRUN!

しかし待てども暮らせどもgmailとどきません…
ナニユエー!
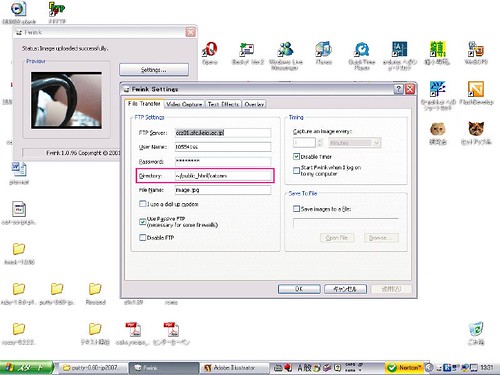
sfcのFTPサーバってなんやー

utano

Putting it all together (p.108)まで終わっています。
ウェブカム画像をサーバにアップする(p.94-97)をやっていなかったので
本がwindowsユーザにおすすめするFwinkを使って始めました。

どこのサーバにあげるかとか色々設定するのですが
FTP Serverに何を入れたらいいかがわからない・・・

ccz00.sfc.keio.ac.jp
web.sfc.keio.ac.jp
sfc.keio.ac.jp

をベースにftp://やらftp.やらftp://ftp.やら
/~t05541ss(あかうんと)やら

あらゆる組み合わせを試しているのですが接続できませんエラーが出ます。

ウェブカムに異常はなさそうです。

かれこれ1時間ちょっとこの状態なので
とりあえずお風呂にはいって最後のProcessingを書きます。

2008年6月12日木曜日

センサ値をグラフ表示

utano

tmg様ごめんなさい、
一個の前の記事のコードではまだグラフは描けないのです…

p.102-103のRefine Itのコードを書き足さないといけないのです。
これならいけるはず:

import processing.serial.*;

int linefeed = 10;//linefeed in ASCII
Serial myPort;//the serial port
int sensorValue = 0;//the value from the sensor

int graphPosition = 0;//the horizontal position of the latest line to be drawn on the graph

void setup(){
size(400,300);
//list all the available serial ports
println(Serial.list());
myPort = new Serial(this, Serial.list()[1], 9600);
myPort.bufferUntil(linefeed);
}

void draw(){
//twiddle your thumbs
}

void serialEvent(Serial myPort){
//read the serial buffer
String myString = myPort.readStringUntil(linefeed);
//if you got any bytes other than the linefeed
if(myString != null){
//trim off the carriage return and convert the string to an integer
sensorValue = int(trim(myString));
//print it
println(sensorValue);
drawGraph();
}
}

void drawGraph(){
//adjust this formula so that lineHeight
//is always less than the height of the window
int lineHeight = sensorValue /2;

//draw the line
stroke(0,0,255);
line(graphPosition, height, graphPosition, height-lineHeight);

//at the edge of the screen, go back to the beginning
if(graphPosition >= width){
graphPosition = 0;
background(0);
}
else{
graphPosition++;
}
}

2008年6月11日水曜日

感圧センサが反応したよ

utano

stk氏とコラボレーションしてp.102まで終わりました。


感圧センサ動いた~♪
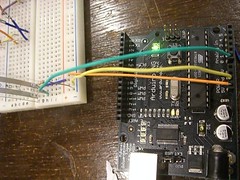
ジャンプワイヤが虹みたいでかわいいでしょ。

p.101のArduinoコード:

/* Analog sensor reader
Language: Arduino

Reads an analog input on Analog in 0, prints the result as an ASCII-formatted decimal value.

Connections:
FSR analog sensors on Analog in 0
*/

int sensorValue;//outgoing ADC value

void setup(){
//start serial port at 9600bps
Serial.begin(9600);
}

void loop(){
//read analog input
sensorValue = analogRead(0);
//send analog value out in ASCII decimal format
Serial.println(sensorValue, DEC);
//wait 10ms for next reading
delay(10);
}


p.101-102のProcessingコード:

import processing.serial.*;

int linefeed = 10;//linefeed in ASCII
Serial myPort;//the serial port
int sensorValue = 0;//the value from the sensor

void setup(){
size(400,300);
//list all the available serial ports
println(Serial.list());
myPort = new Serial(this, Serial.list()[1], 9600);
myPort.bufferUntil(linefeed);
}

void draw(){
//twiddle your thumbs
}

void serialEvent(Serial myPort){
//read the serial buffer
String myString = myPort.readStringUntil(linefeed);
//if you got any bytes other than the linefeed
if(myString != null){
//trim off the carriage return and convert the string to an integer
sensorValue = int(trim(myString));
//print it
println(sensorValue);
}
}

chapter3 準備するもの

utano

STKさんと同じところまできてます。
まだマットできてなくてすみません。

以下、chapter3で必要なものリストの原稿(blog)ですので
目を通しておいてください。

特にYSKさんmacに関すること補足情報が欲しいです。

******************************************

chapter2もまだ終わっていないのにもう次の話か!
って感じですが、chapter3を行うまでに以下準備お願いします。

chapter3ではPHPという言語でプログラムを書きます。

☆テキストエディタ(好きなものを落としてください)

windowsユーザの方は:

PHP editor
スーパープログラマー翔さまのおすすめPHPエディタ

xyzzy
一番上のxyzzyリンクをクリック
私が2春の時プロ入で使用したテキストエディタで、一応書けました

macユーザの方は:

mac OS Xには最初から「テキストエディット」という
テキストエディタが搭載されています。他にもありますけどね。

mi
グーグルさんで検索すると出てきましたw

☆command lineでリモートアクセスできるソフトウェア

windowsユーザの方は:

PuTTY
A Windows installer for everything except PuTTYtelと文の下の
putty-0.60-installer.exeをダウンロードしましょう。

macユーザの方は:

Terminalというものが[Applications]⇒[utilities]の中にあります。
そこでsshというコマンド入力をすると使えます。

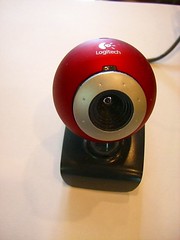
☆ウェブカム

安いものは500円くらいから秋葉原で買えます。


macユーザの方へ:

macユーザの方は普通のUSBカメラを使うためにドライバを入れましょう。
macamというドライバです。
インストール後macamの中にあるmacam.componentというファイルを
ハードディスクの[ライブラリ]⇒[Quicktime]ディレクトリに入れましょう。
/Library/Quicktime/macam.component って。
そうするとウェブカムを使うソフトウェアで、
ちゃんとウェブカムが認識されるようになります。

☆ウェブカムの画像を取り込むソフトウェア

googleで調べると色々でてきますが、本がお勧めしているのは

windowsユーザの方は:

fwink

macユーザの方は:

Evocam
シェアウェアなので有料なんですね、これが…

☆感圧センサ

ツクモロボット王国で売っています。一つあたり2600円くらいします。
でも8個まとめ買いすると一人あたり2060円になります!

2008年6月10日火曜日

初めてのPHP

一応P91の下のプログラムができたっぽいです。

プログラムによるとif文の判定から僕はまだお酒を飲んではいけないらしいのですが
どの値から結果を出しているのですかね?

あとP90の下にあるプログラムもよく分からないです。
こんな感じです。

あとコマンドライン(putty?)関係が一切分かりません。
英文をしっかり読まないといけないみたいです、頑張ります。

2008年6月6日金曜日

途中経過

やすこ

今日はP108まで終わりました。
PHP書いて、sensorValueの値によって、メッセージが変わったり、メールが送られてくるものです。

こんな味気ない画面ですがw
http://web.sfc.keio.ac.jp/~s05434ys/catcam/cat-script.php?sensorValue=330このアドレスの330の値を12とか適当な値に変えてみてください。
※thresholdは320です。

次はProcessingとの連携だ!

PHP

utano

ワタシの課題:
p.30-31のcommand lineはやっぱりわからん
p.92-93でtelnet smtp.example.com 25で接続エラー出る

ソースコードを貼り付けようとしたのですが
HTMLを含んでいるのでエラーが出てしまい貼れませんでした。

では寝ます。

2008年6月5日木曜日

phpについて

utano

作業が遅いです、すみません。

一つ提案ですがこれから進行にズレが生じてくると思うので
投稿した記事のタグにchapter3など章のタグを付けませんか??

今PuTTYを使ってcommand lineに書き込んだりしています。

p.89終わりにChapter1で書いたPHPを
command lineから呼び出そうという所で戸惑っています。

p.30-31を見ながらPHPファイルを作って
学校アカウントのpublic_htmlディレクトリに上げました。

php hello.php
で本来command lineからファイルを呼び寄せる事が出来るのですが
php: Command not found.
といわれます。

さかのぼってPHPのバージョンを調べるために
php -vを入力しても同じ結果が出ました。

????

ちなみにウェブブラウザからは確認が出来ました

今日はここまで。明日とりあえずすっ飛ばして(いけるのか?)先を見ます。